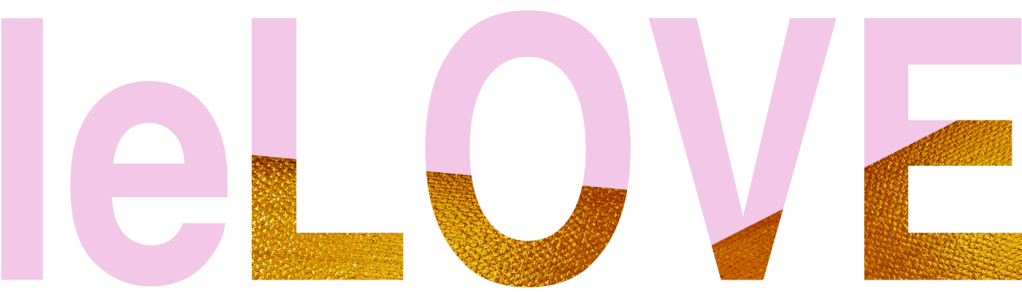


L A Y E R S
Trying to get the concept of layers in Photoshop to make sense and stick in the brain can be a little tricky. When I explain it to a class I use props, which is a bit tricky on a blog, but I'll try. You know those old fashioned over head projector sheets? The clear pieces of plastic that you can write on with a marker? Imagine taking a stack of those, drawing a different thing on each piece then placing them on a light box. What can you see? Probably a scrambled drawing, but with all the parts visible. Each clear sheet is like a photoshop layer; transparent and stacked. Now imagine taking another clear sheet, a fresh one with nothing on it, and placing it on top of the others. If you drew on this piece it would change the image you can see, but would it effect the layers below? No. This is the beauty of working with layers; you can easily make changes to an image without destroying the original photo or drawing. This is what is meant by non destructive layers. The other fantastic thing about layers, and yet again I am showing my design nerd side, is that it is so easy to test out how new elements might look without committing. I hate commitment so this suits me perfectly.
A few pointers for working with layers in Photoshop:
- Try to make it a habit that before you select the tool you want to use, say the type tool or the brush tool, make a new layer. Some of the tools in Photoshop automatically create a new layer, but others don't. I find it best to always do this when you are starting out to avoid making mistakes that take time to fix.
- To create a new layer there are several things you can do. Layers are so important that they get their own menu, so you can go to Layers>New. I love keyboard short cuts, so I usually use Ctrl/Cmnd+Shift+N. The third option you may remember from the last post; that little tiny icon at the bottom of the layers panel.
- Organising and labelling your layers is always a good idea, because if you get to the point where you have a gazillion layers, if they aren't organised things get crazy. I will show you how to do this in the tutorial below.
- Deleting unwanted layers is easy. Make sure you have the layer selected then either hit delete or the trashcan icon in the layers panel. Alternatively you can drag the layer to the trashcan and let it go.
- All new photoshop documents start with a locked background layer, that is a layer that can't be altered until you unlock it. If you really need to change this layer, double click on the layer and then click ok on the box that pops up.
- Duplicating layers is easy- just drag the layer you want to copy to the new layer icon and drop.
- Remember our hypothetical stack of transparent drawings? What if you wanted to pull one out of the stack and see what the image is like without it, but maybe add it back in later? We do this in photoshop through the visibility toggle. It is a little eye icon next to each layer that when clicked, toggles between the layer being hidden and visible.
What are all those other buttons?
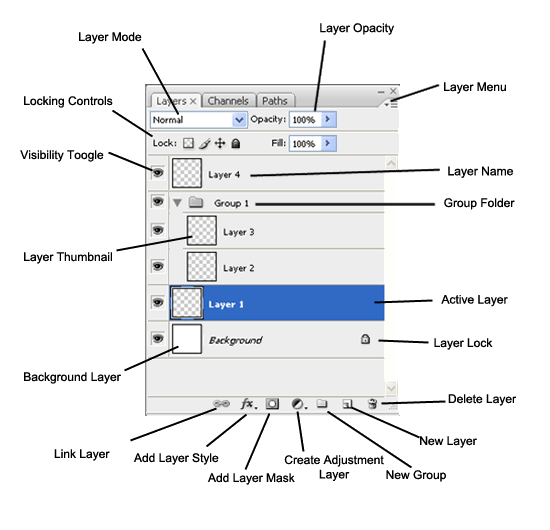 |
| //Via HERE// |
Putting it all together:
Today we are going to use all our new knowledge of colour and layers to create a super spiffy animation just like this one.
Watch my dodgy screencast below to learn how I did it.
xx Samantha Alice

nice posting and just in time.
ReplyDeleteI was planing to learn more about layers.
thank you for sharing.
Thanks Nina, I hope you find it helpful! Please let me know if there are any other parts of Photoshop that you are curious about! x
ReplyDeleteSam (can I call you that?), you are a GENIUS! This is exactly what I needed. You are a great teacher. I've always wanted to learn how to make gifs and thanks to you, now I can!
ReplyDeletewww.jenkakio.com