Sometimes I feel like I am a hairdresser.
I was the resident braider for my campsite at a festival a couple of years ago and, honest, I sat for two hours each morning braiding my friends hair to their various specifications. My sister makes requests at least weekly for me to pretty pretty please braid her hair; "You know, just like you did it that other time?" although, I more often than not fail to do it the way she has imagined. I do love it despite my secret tiny loathing.
You see it is always easier to braid someone else's hair than your own, and just once I would like to have someone do my hair. That is why I love this look because, although elaborate looking, it is quite possible to self braid.
Just on a side note this is my sister in the photos, with her enviable long, thick and shiny hair. She loved this look so much she demanded it the very next day. I did my best, but she still trilled "Wasn't it different yesterday???".


You will need a comb, some alligator clips, bobby pins and hair elastics to secure.
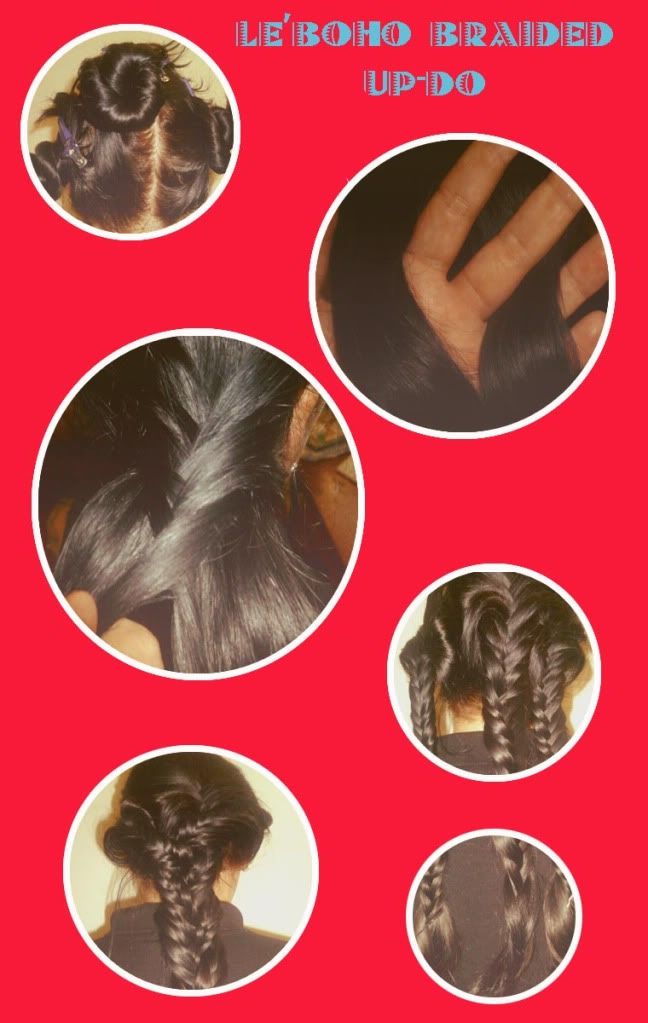
- Separate the hair into three sections; one either side and one down the centre. Secure these with alligator clips.
- Take one section and split this into two. If you have done a fish braid before then you know what to do. If not, you will need to start by taking a small piece of hair from the outside of the left hand section of hair, and take it to the inside of the other section. Repeat from the other side. You are essentially swapping hair back and forth from the two sides. I have made mine quite chunky but the smaller the pieces of hair, the finer and prettier the braid. Continue all the way to the end of the hair, then repeat with the other two sections.
- Plait the three fish braids together to form one mega braid as seen in the fourth image down.
- Secure this with a hair elastic.
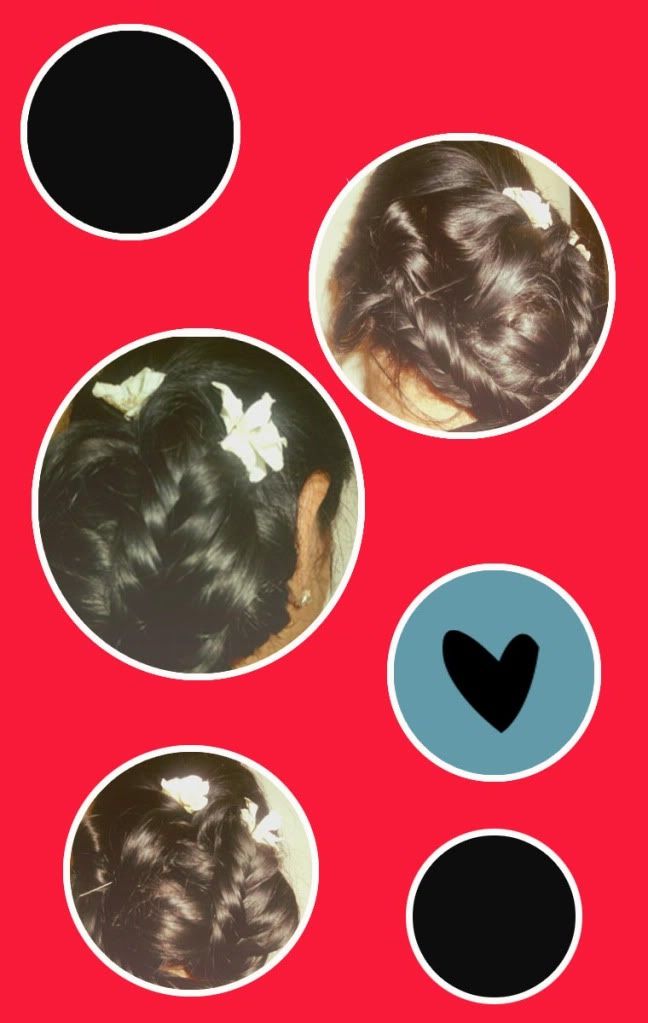
- Take the end of the plait and take it under the base of itself, tucking it under. Pin this in place until it feels secure.
- Keep pinning until the whole thing feels secure otherwise there is danger of it falling out.
- The fishtail braids may need to be manoeuvred into a desirable position and secured. We want it to look something like the images above but find what works for you.
Only two days left of my DIY Christmas!
Adieu x


Hi , thanks for stopping by my blog :)I love your style and your blog and I am now follwing with bloglovin and google.
ReplyDeletexo
Dora
http://adropofindigo.blogspot.com